1 How to Normalize Volume with Windows 10 Loudness Equalization2 How to Adjust App Sound Individually with the Volume Mixer3 How to Adjust App Sound Individually in Windows 10 Settings
What is audio normalization? Audio normalization looks to maintain a consistent audio volume regardless of volume differences between media or within a single piece of media. It boosts quieter sounds to match the loudest so you can set your volume to a set point without ear fatigue. Windows 10 loudness equalization does this very effectively most of the time. However, you may notice some differences in the media you consume, especially when gaming. Some games, movies, and music use audio normalization to give you a better sense of space and depth while listening. As a result, audio normalization isn’t for everyone. Audiophiles may notice a difference in quality, so it’s worth trying out for yourself. If it’s not a good fit, you can try the section part of this tutorial, which will show you how to increase volume on Windows 10 for each application using the volume mixer. Let’s get started:
How to Normalize Volume with Windows 10 Loudness Equalization
How to Adjust App Sound Individually with the Volume Mixer
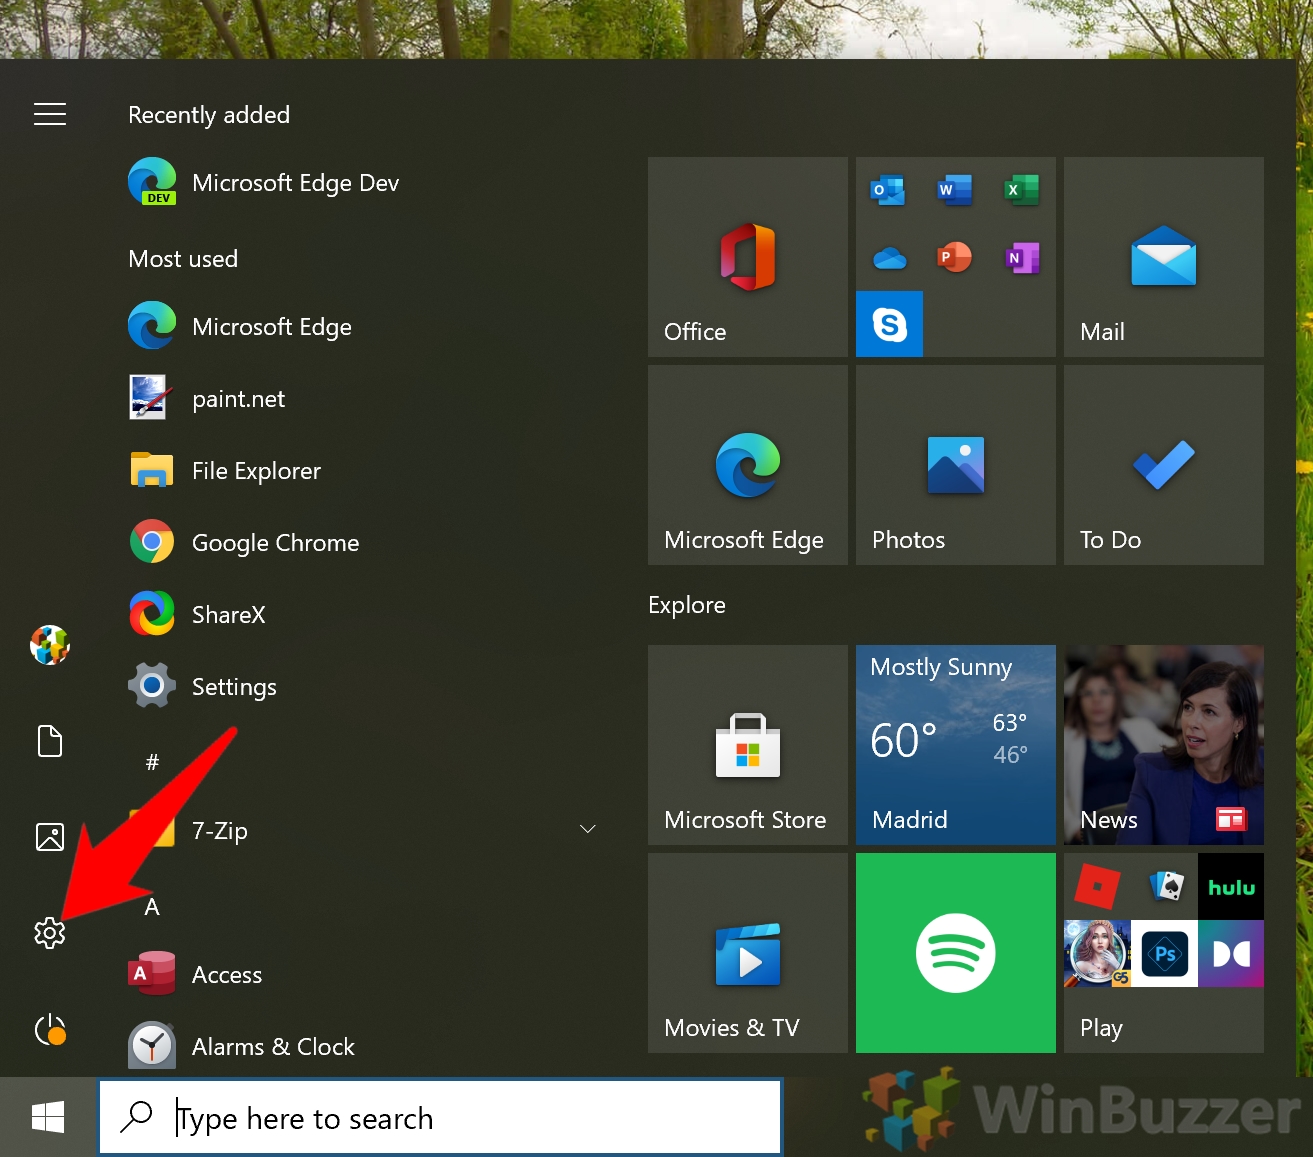
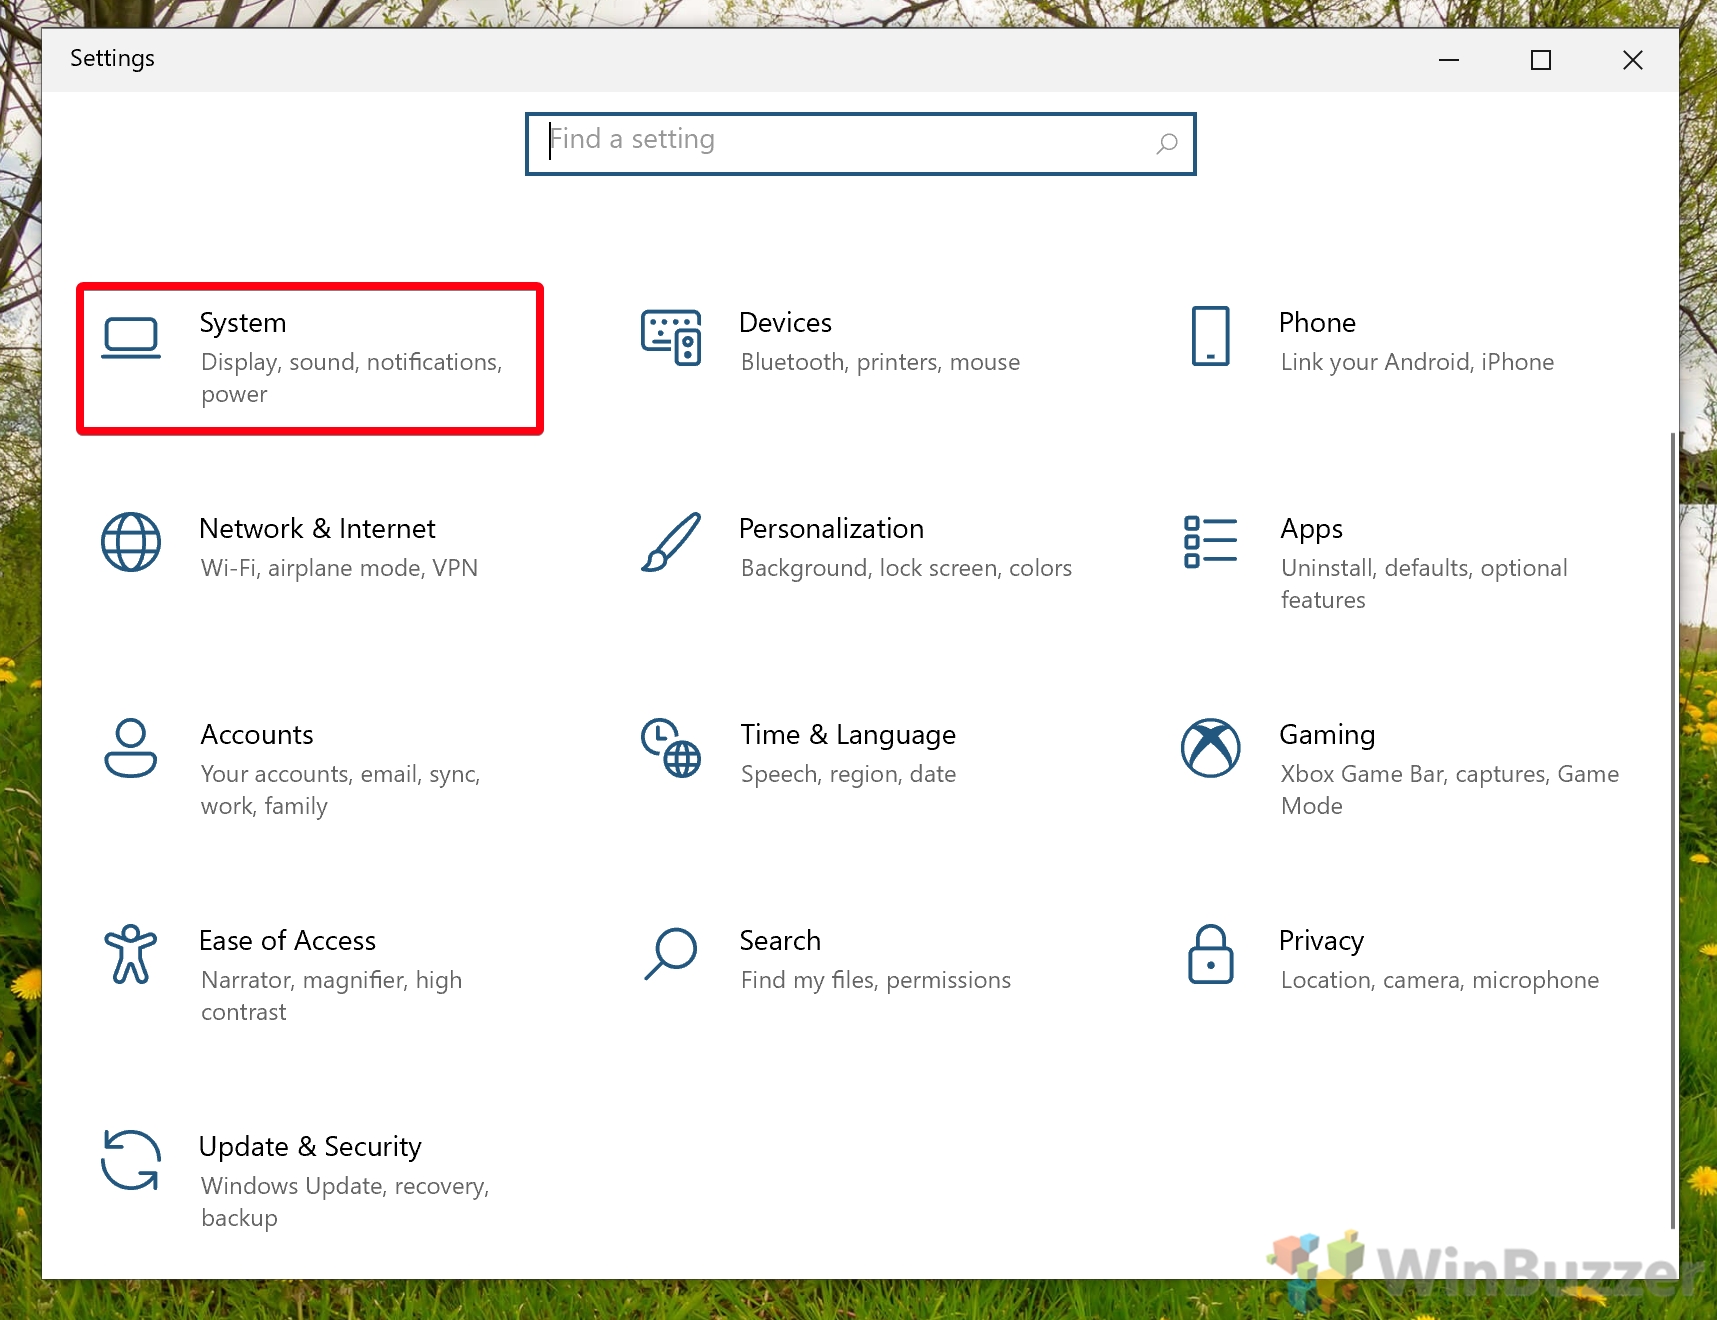
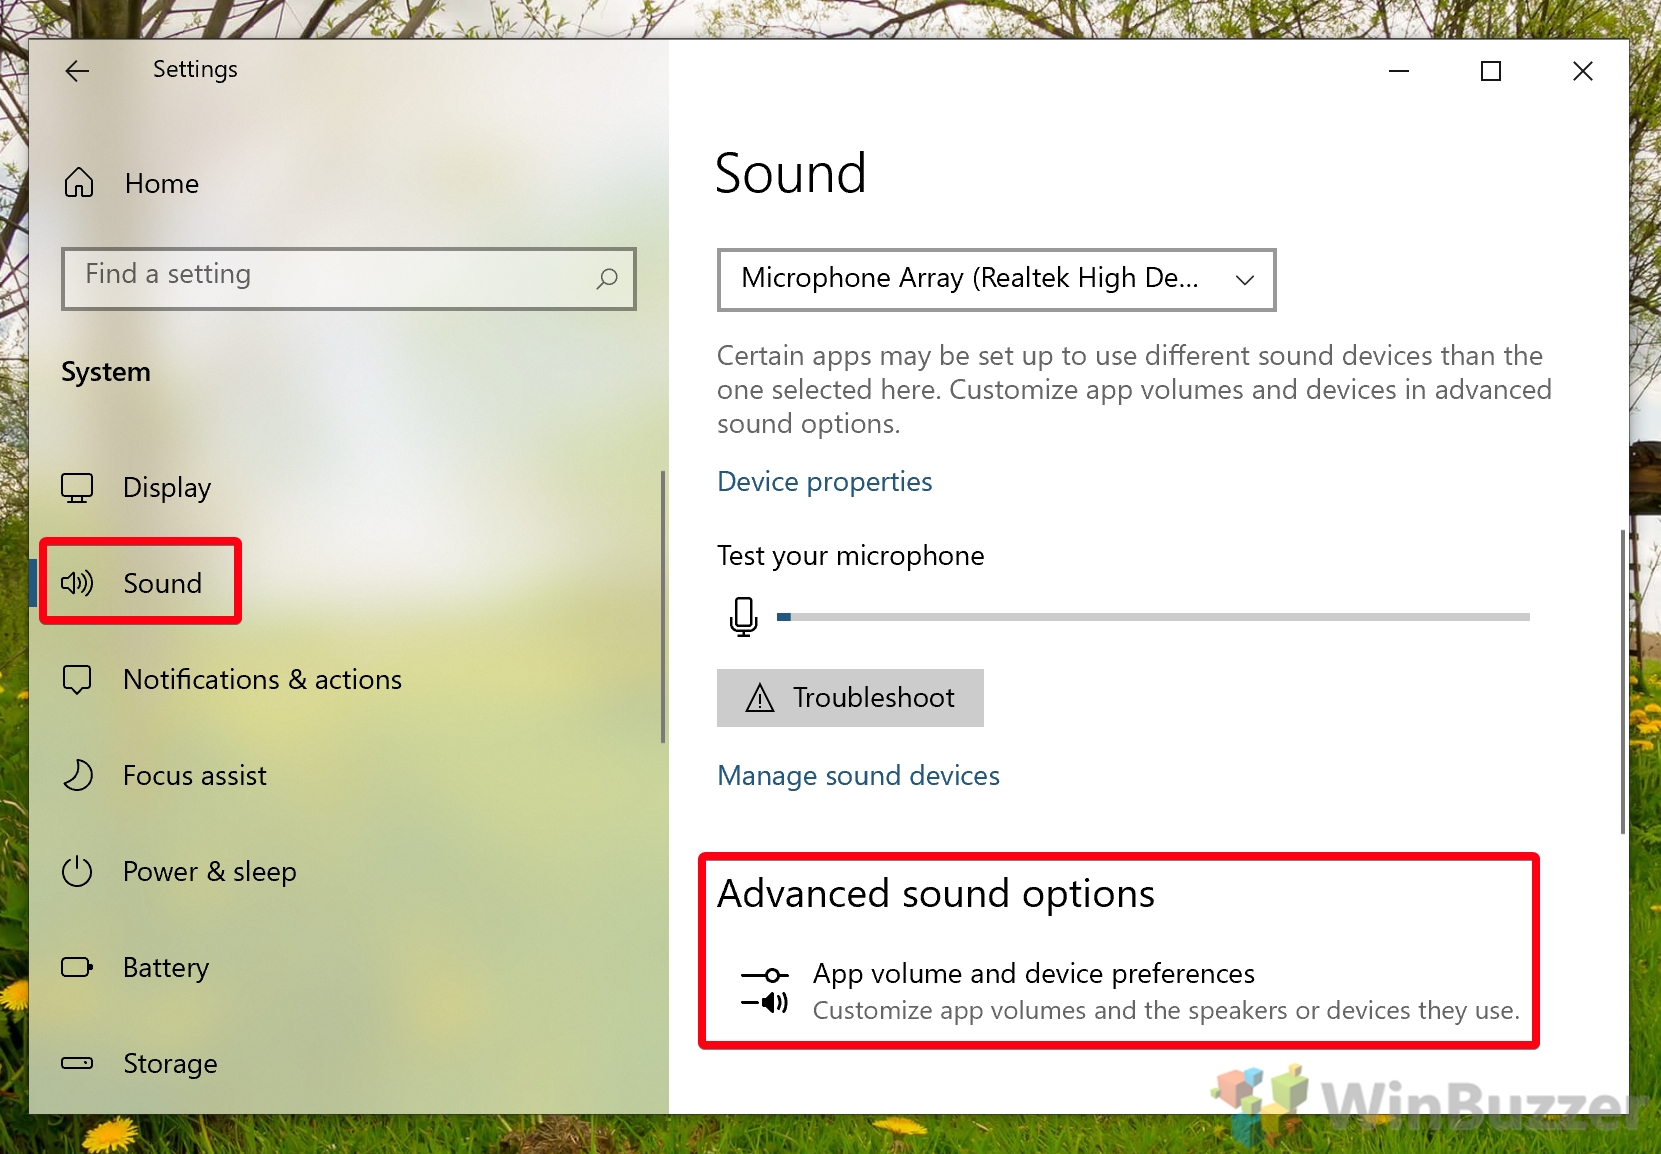
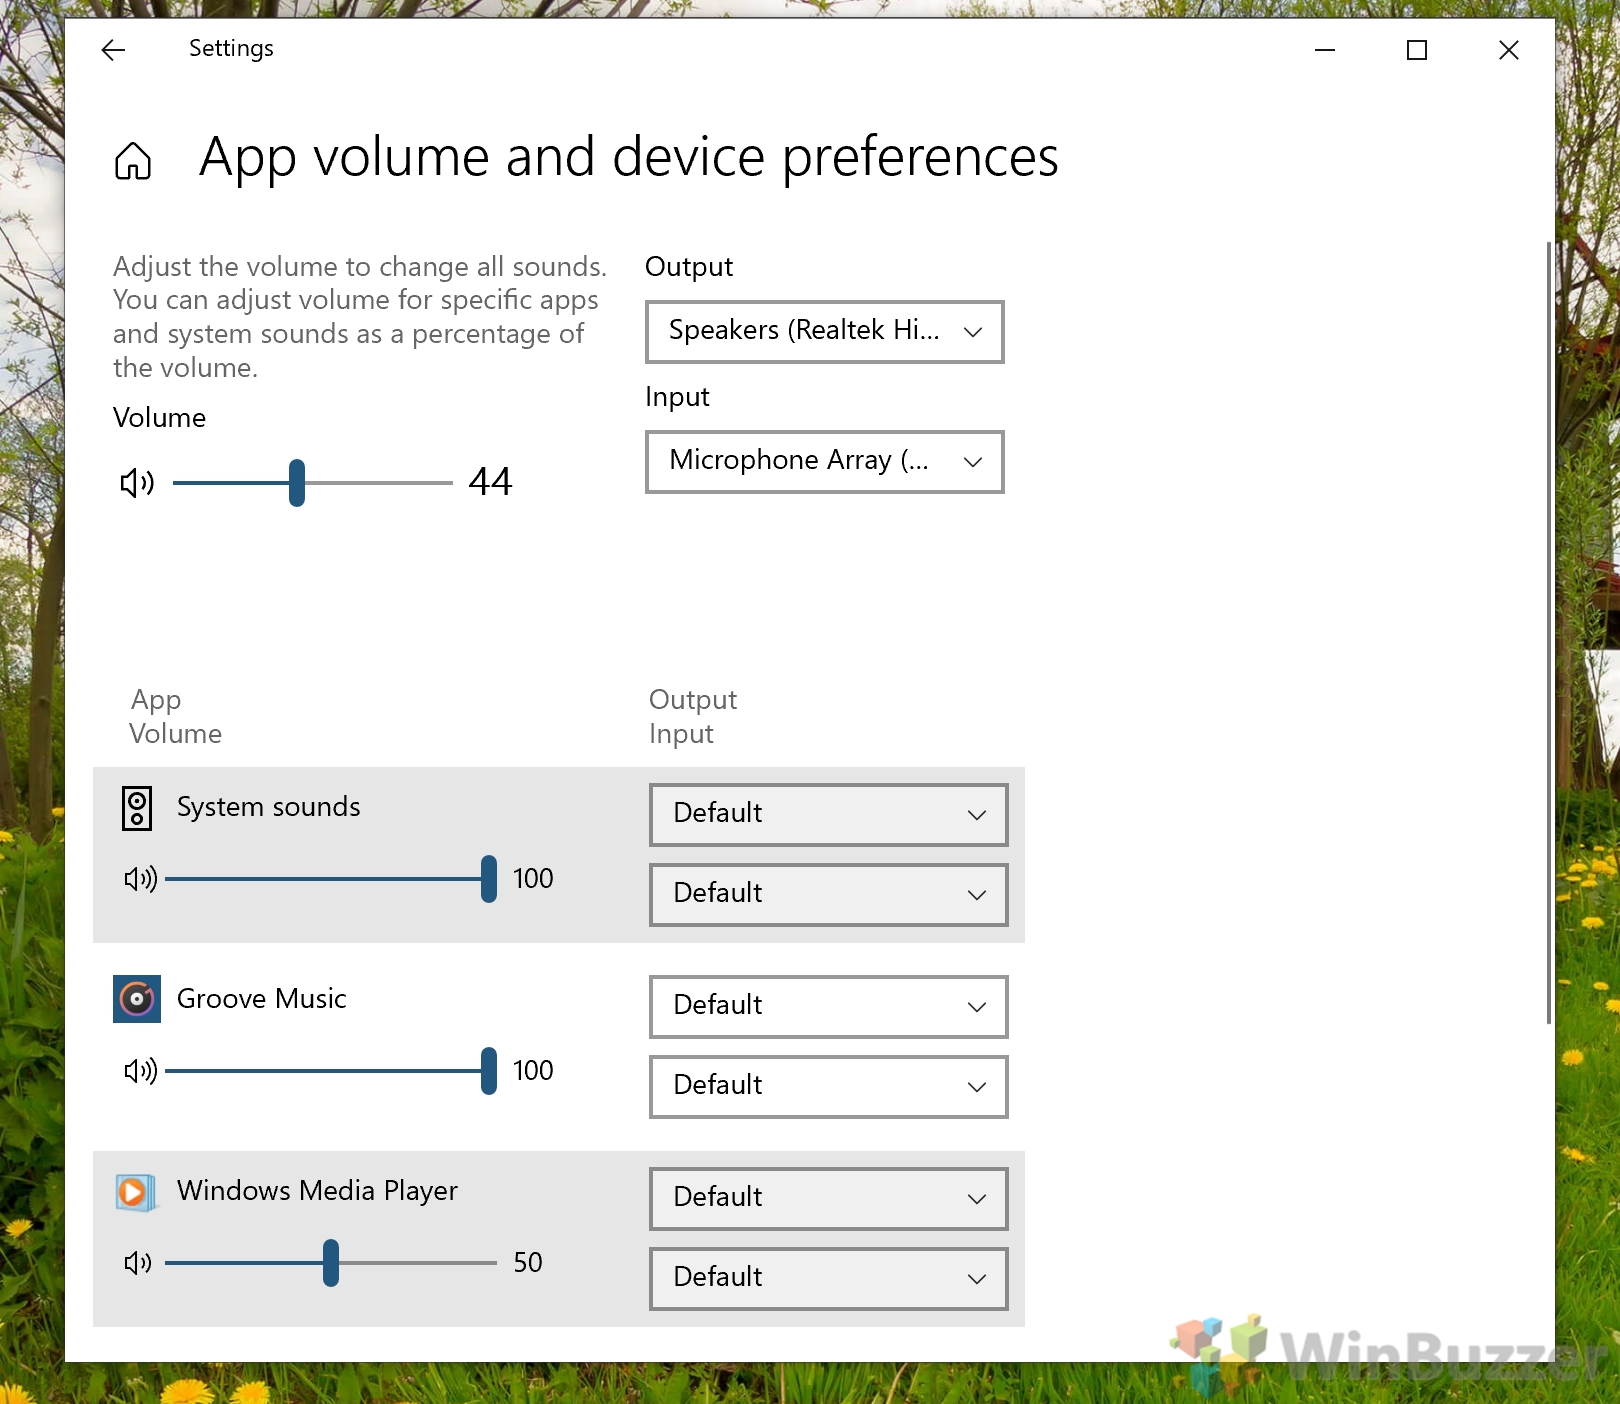
How to Adjust App Sound Individually in Windows 10 Settings
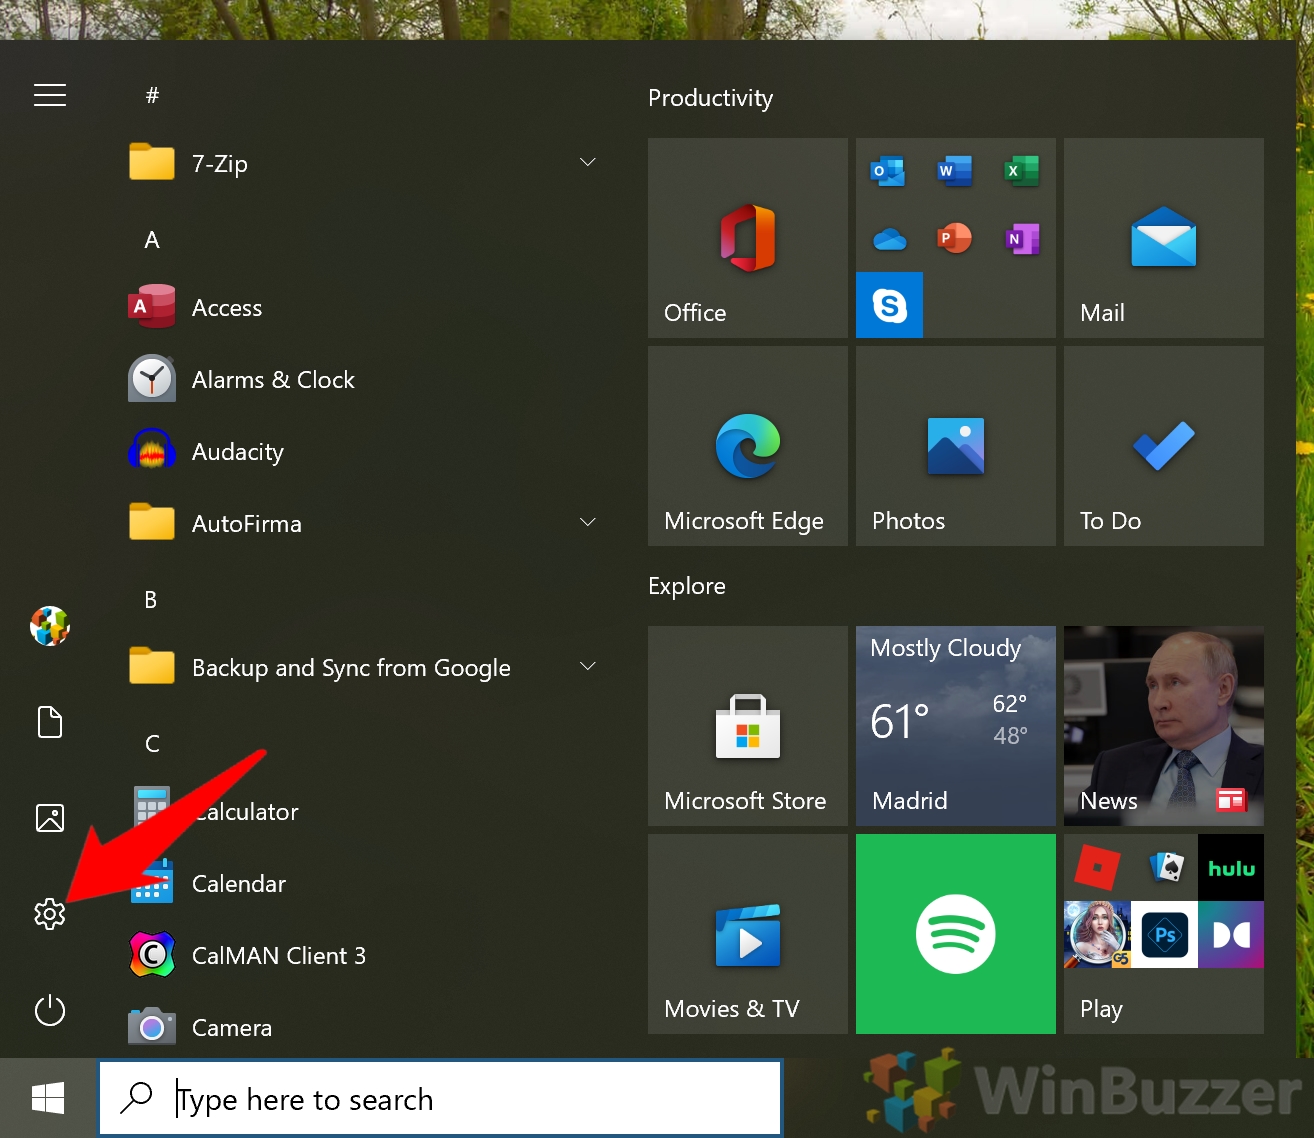
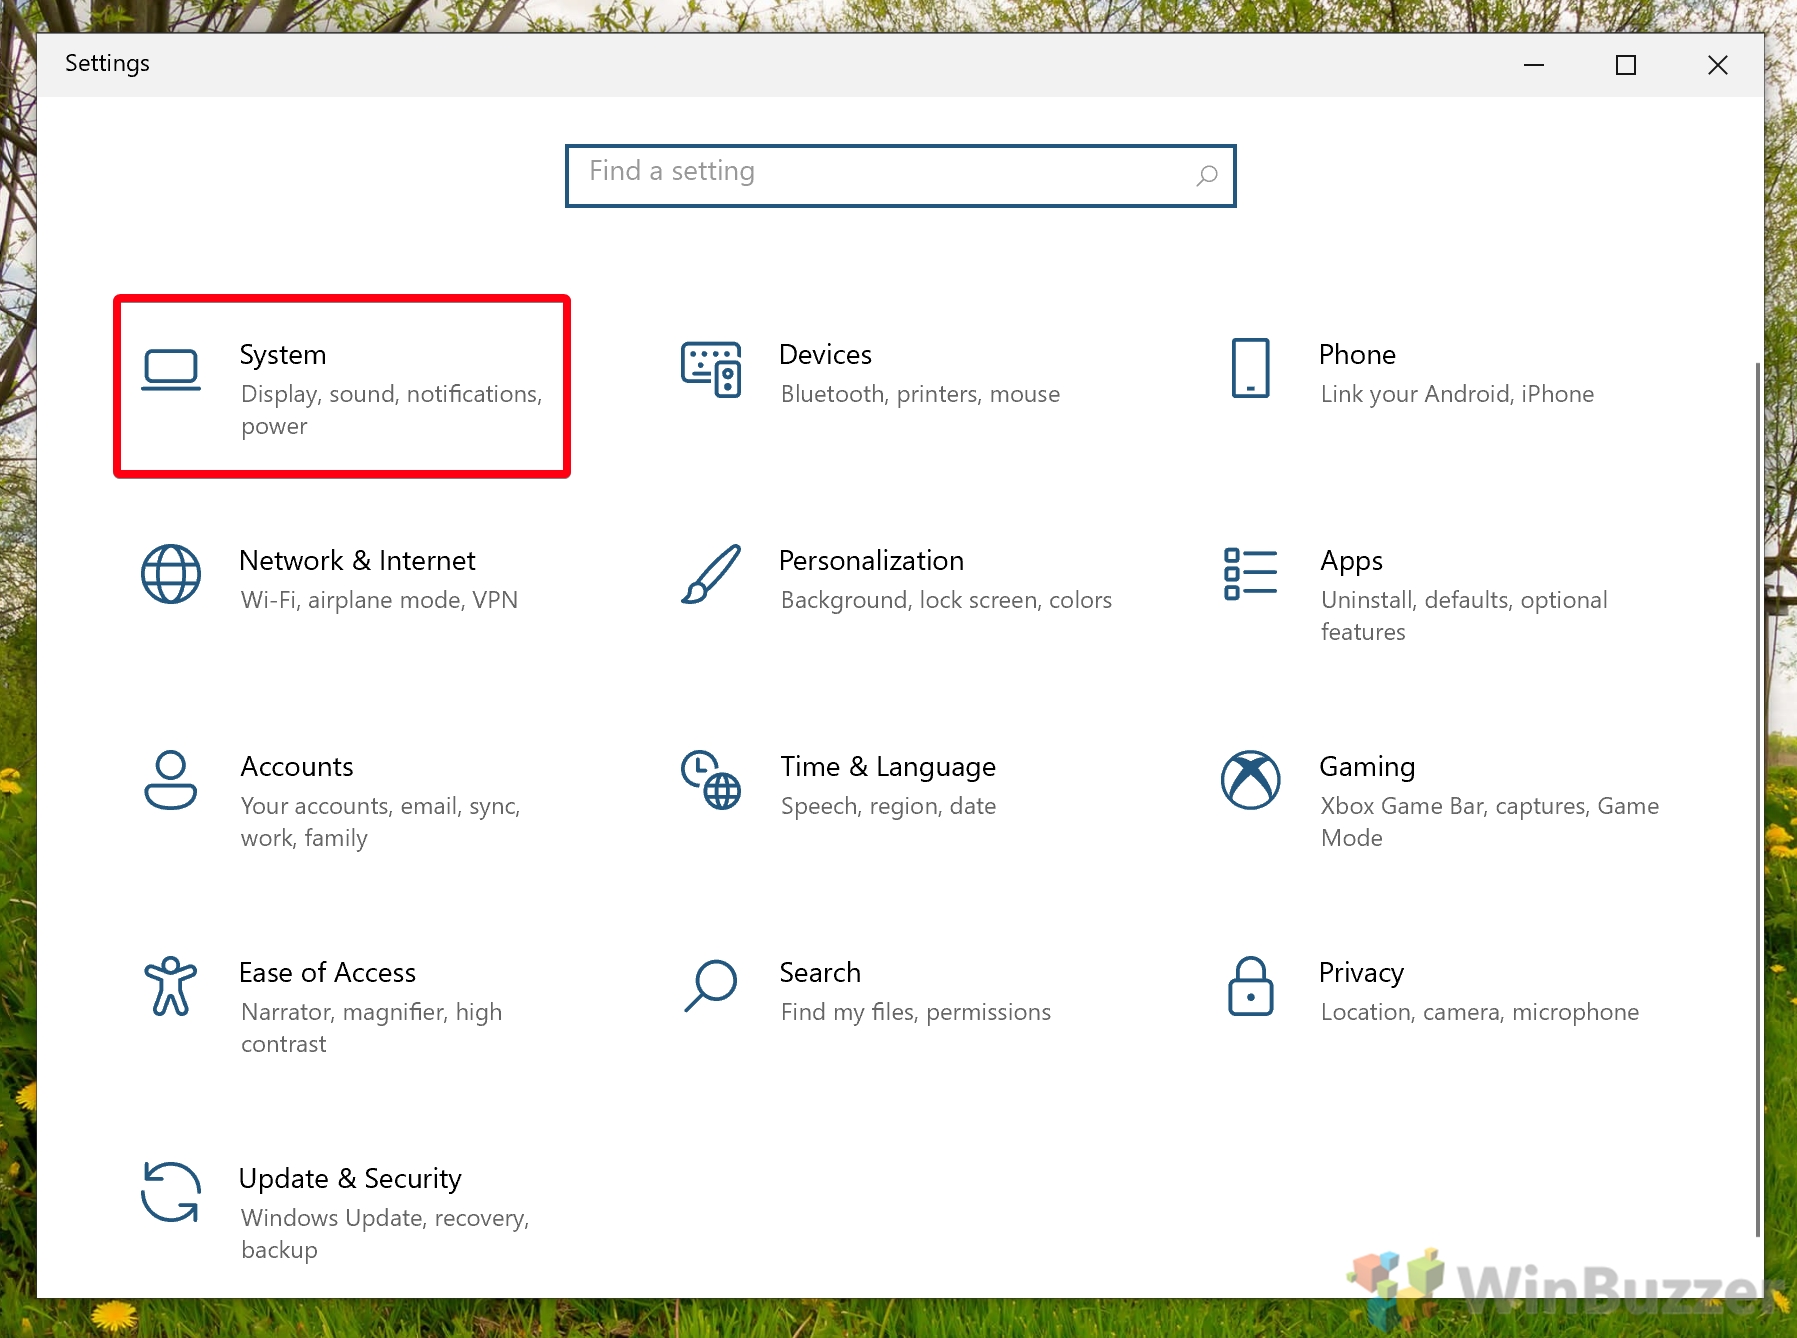
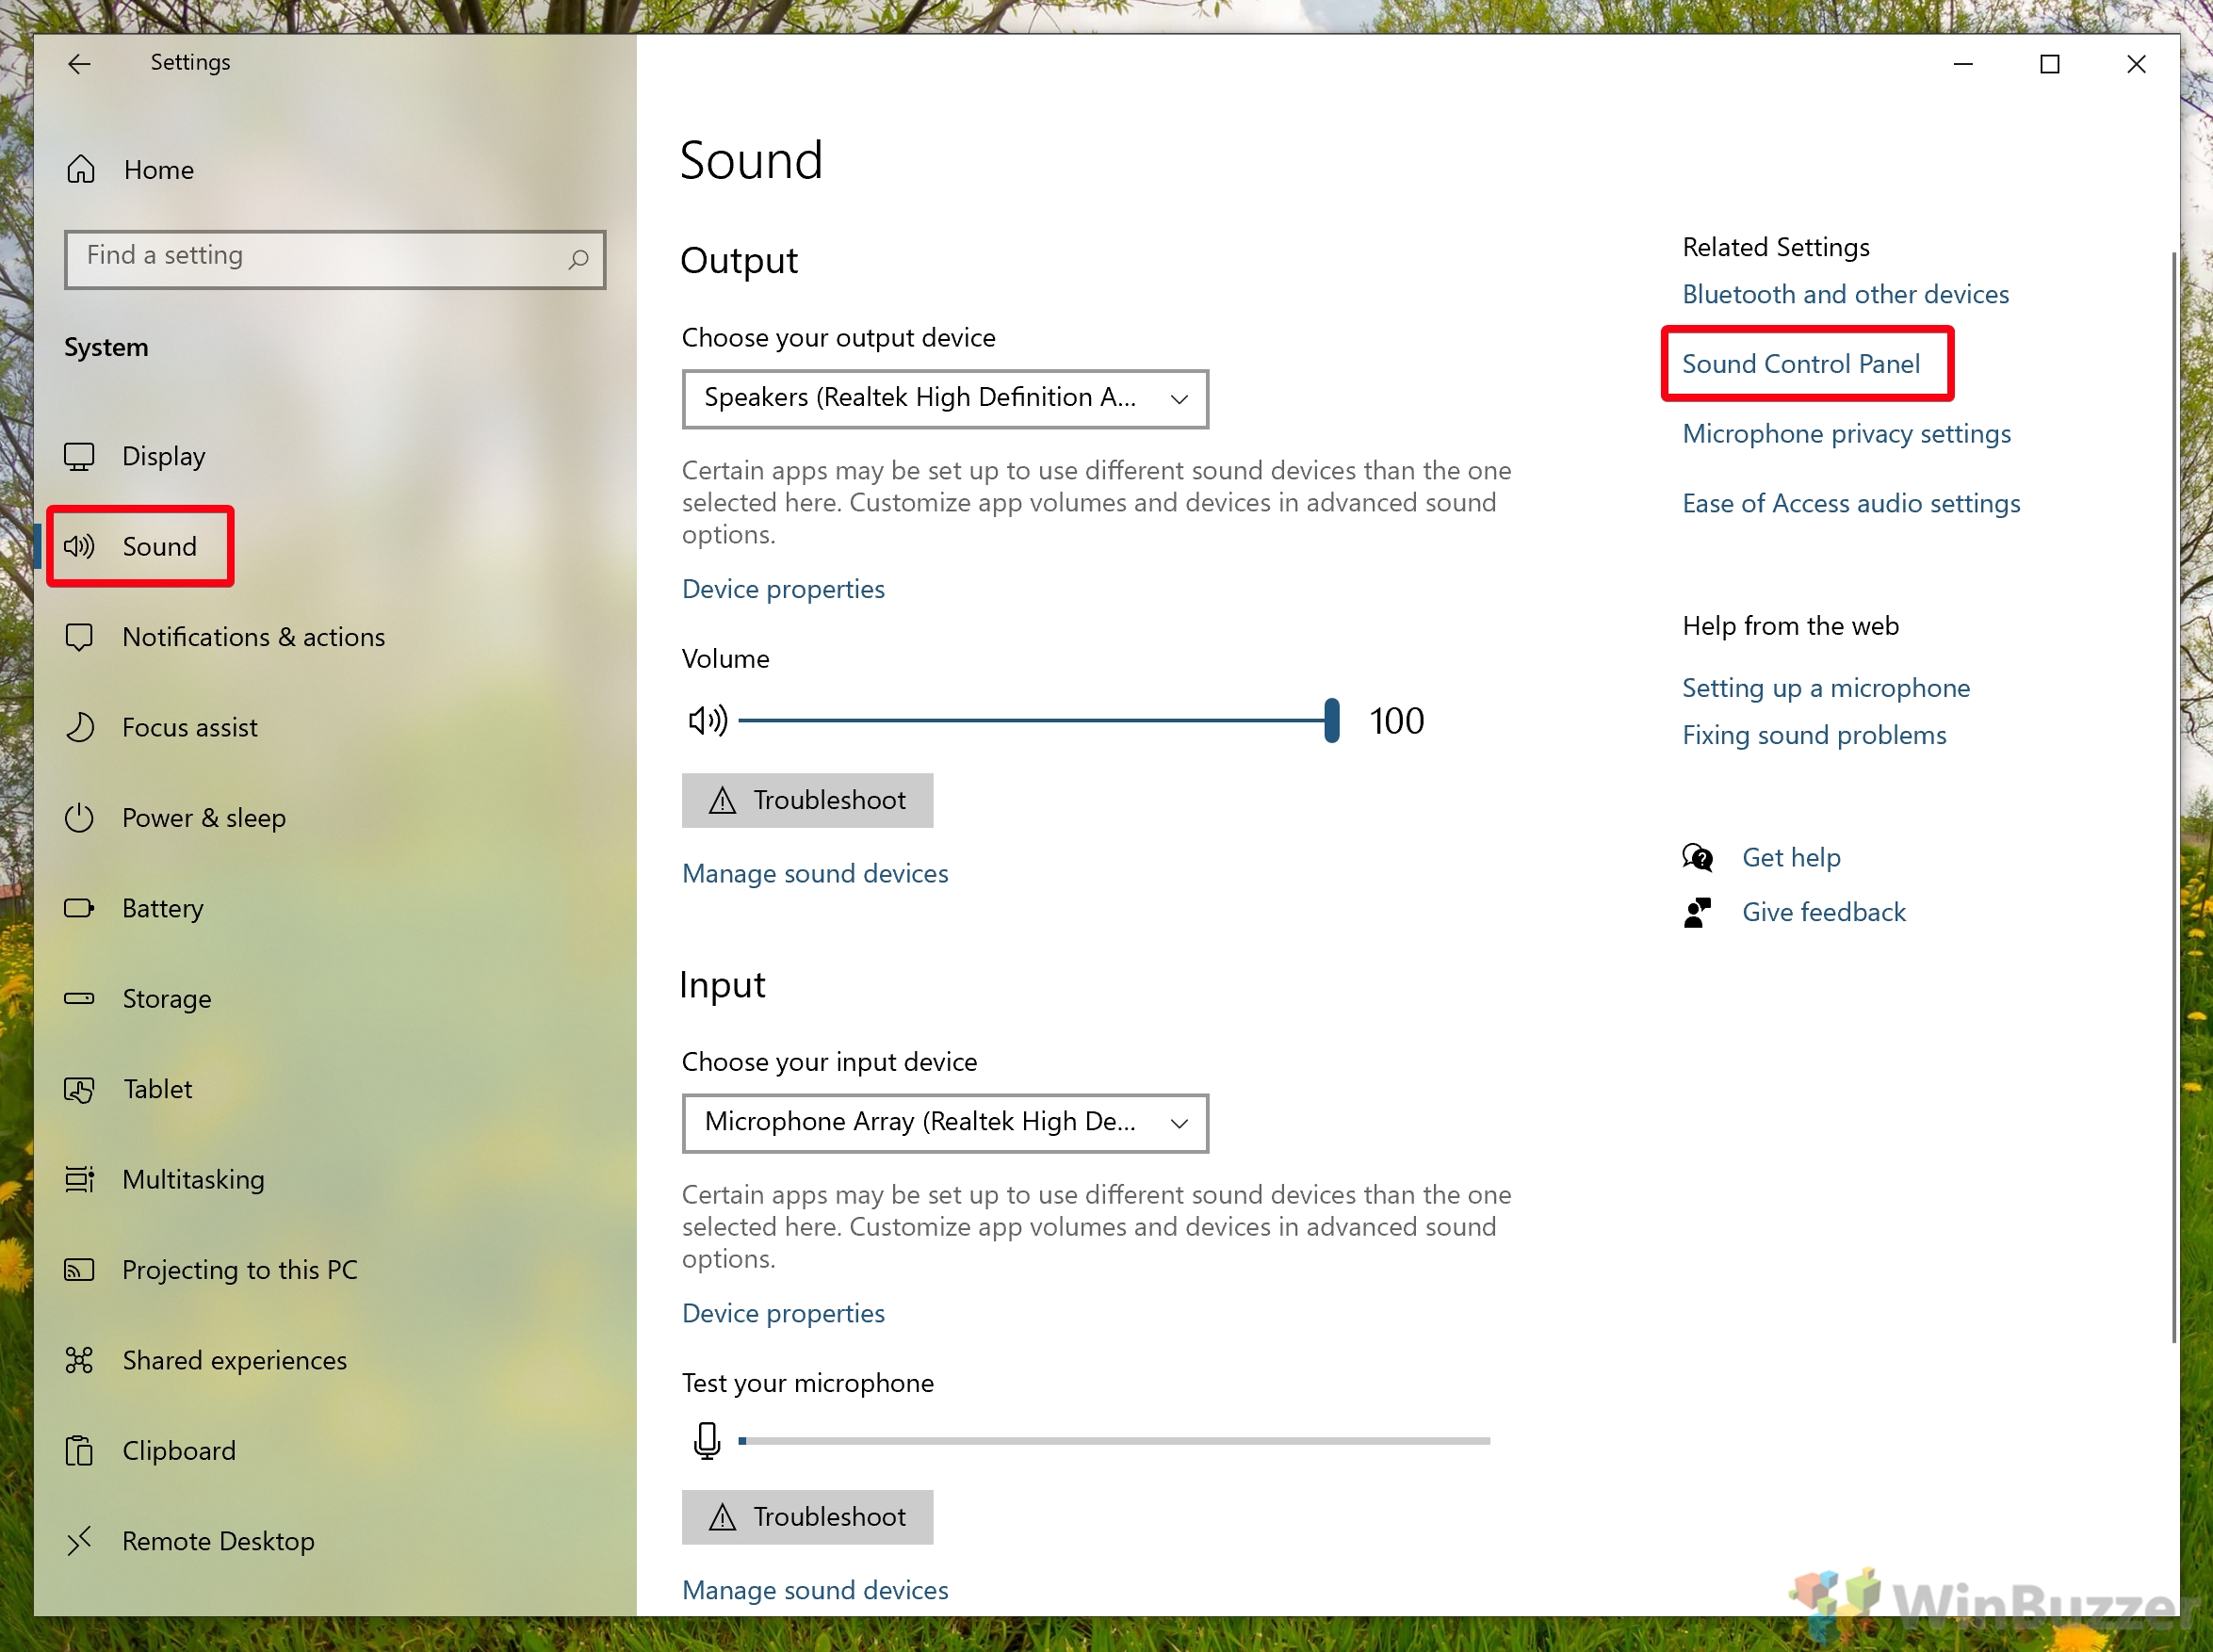
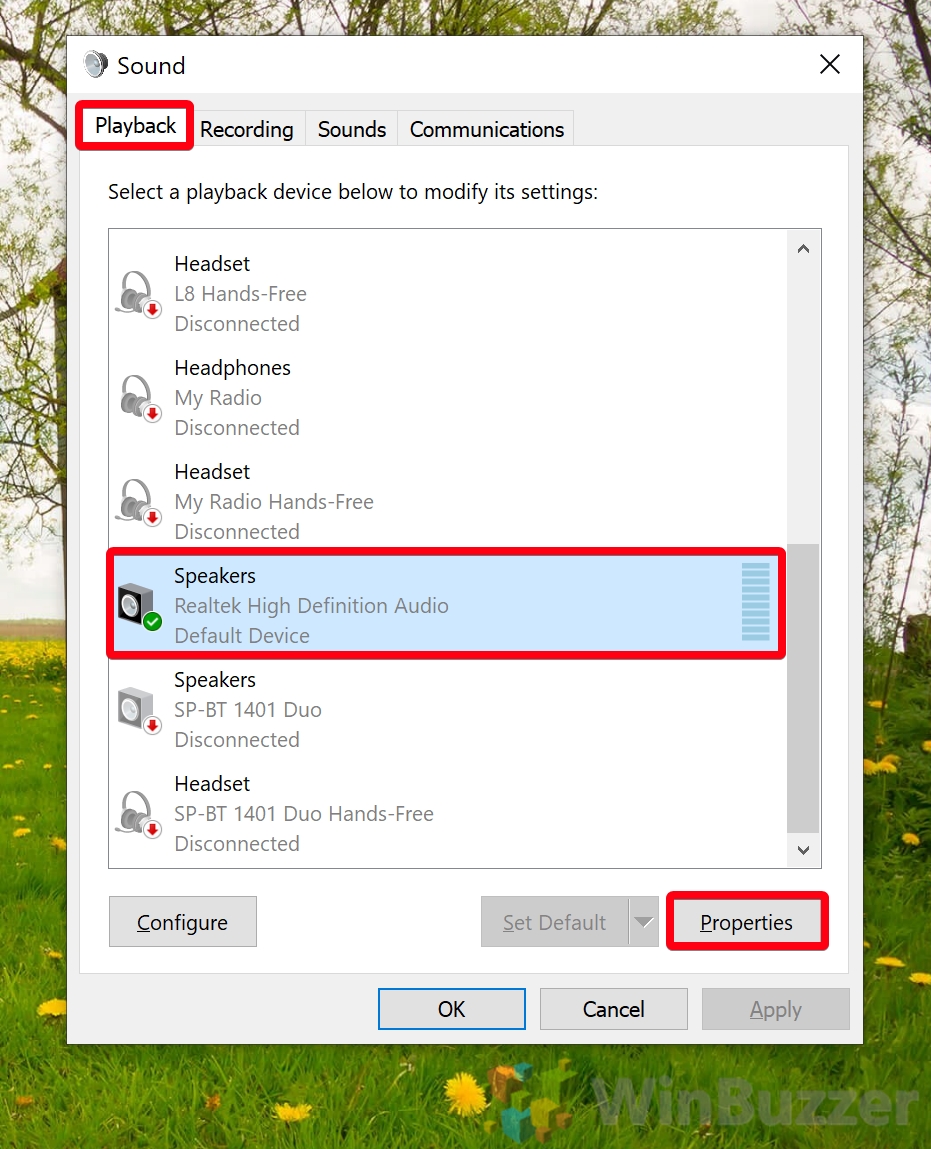
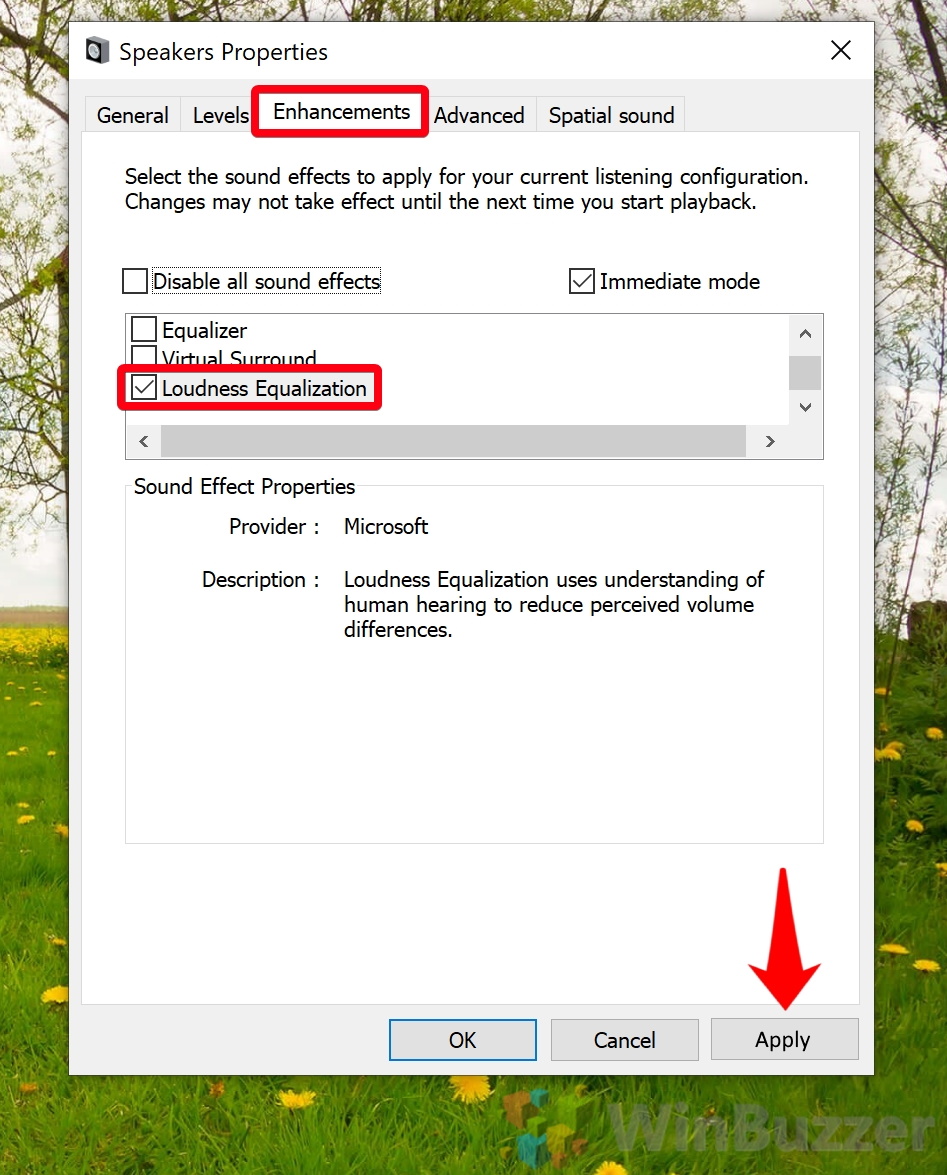
With that, you should have a pretty good idea of how to use the Windows 10 sound equalizer and loudness equalization settings. If you weren’t able to use the audio normalizer due to incompatibility, you can try one of the free third-party solutions available online. Here’s how you can check if you have an audio normalization setting and enable it if so:
You can now close your properties and settings windows and play a clip to test your audio normalizer.
If you’re looking for more in-depth audio controls, you may be a Windows 10 sound equalizer you’re looking for. Meanwhile, if you’re looking to improve the immersion of your audio, try Windows Sonic for Headphones.
![]()
![]()
